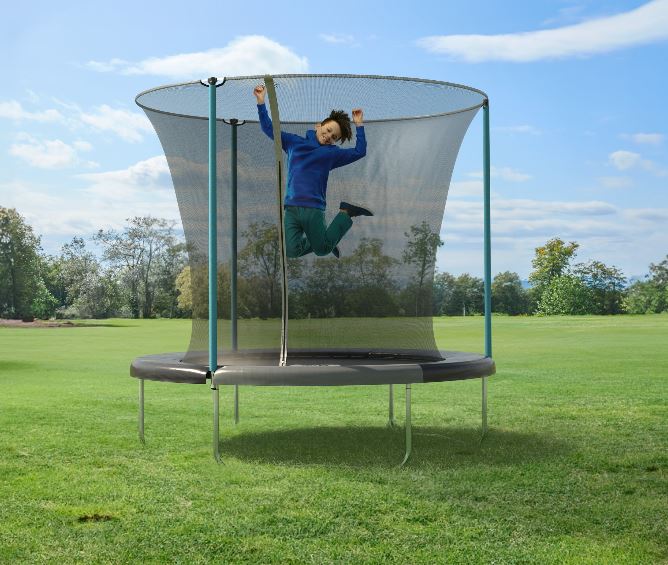
Trampolines are an excellent way to keep both kids and adults active and entertained, for hours on end.
If you’ve decided to jump on the trampoline bandwagon, we have a few tips for setting them up safely. It’s really important to follow manufacturer guidelines when setting up your 8ft trampoline with enclosure, to ensure your trampoline is stable, and able to withstand frequent use.
In this comprehensive guide, we will walk you through every trampoline set-up step. We will take into account factors such as clearance, surface type and the tools you’ll need handy.
How Do I Safely Set up an 8FT Trampoline: The Groundwork
Setting up your 8 ft-sized trampoline safely is the best way to prevent accidents and injury. Here is a general overview of the key steps:
- Read the Manual: We know it’s not very exciting, but you do need to cast your eyes through the manual before you begin. The manufacturer’s manual is the be-all and end-all when it comes to guidelines, safety recommendations and detailed diagrams.
- Location, Location, Location: You need to find the perfect spot in your garden. Yes, you want the trampoline to look good, but you also need to ensure it’s in a safe space. Choose an area that has enough clearance, avoid overhead obstructions and ensure the ground is flat and stable for a good trampoline fit.
- Area Inspection: Once you’ve got an idea of the location, give the area a very thorough once over. Clear the space of rocks, debris or anything hazardous.
- Look for Level Ground: The foundation for a stable trampoline is a level surface. Setting up your trampoline on uneven ground is setting yourself up for failure.
- Inspect All Parts: Before you start setting the trampoline up, check all individual parts are in good working order. Damage or defects can impact the integrity of your trampoline.
- Ensure Everything is Secure: As you carry on with the assembly, check and double-check all parts are secure. Pay particular attention to bolts and springs. Loose parts can lead to instability, which can then lead to accidents.
- Use Safety Accessories: Trampoline accessories can help users stay accident and injury-free on the trampoline. Whilst setting up your 8ft trampoline, make sure you fit an enclosure net, padding and an anchor system.
- Regular Maintenance: The work doesn’t end once you’ve finished setting up your trampoline. Regular maintenance is essential. Check for wear and tear or damage, and replace/repair any faults as soon as you see them.
What Are the Essential Steps to Follow for a Secure and Stable Setup of an 8FT Trampoline?
Now, we’re going to look a little closer at some of the steps, giving more technical advice for your 8ft trampoline set-up:
- Lay Out the Parts: Before you jump right into assembly, take the time to lay out all the trampoline parts. This step ensures that you have everything you need. It also reduces the chances of you misplacing anything important.
- Frame Attachment: As you start attaching the trampoline frame, you must follow the manufacturer's instructions with precision. Every connection should be made carefully and securely.
- Spring Attachment: After successfully assembling the frame, it's time to move on to another critical part. Attaching the springs requires focused attention to detail, you need to ensure that the tension is evenly distributed. Any imbalance will result in uneven bounce, which could cause accidents.
- Mat Installation: Positioning the jumping mat over the springs is a task that requires a steady hand. The mat should be centred and properly aligned, with the right level of tension. If it's too loose, the bounce quality will be affected. On the other hand, if it’s too tight it can put stress on the springs which will lead to excess wear.
- Safety Pads: Install the safety pads to cover the springs and frame. These safety pads are a protective barrier, offering cushioning in case bouncers accidentally collide with solid parts.
- Secure Enclosure Net: If your trampoline comes equipped with an enclosure net, you must follow the manufacturer's guidelines to install it correctly. The enclosure net is an essential barrier, protecting users from bouncing off. Poor installation will affect the performance of the net.
- Test for Stability: Before giving the green light for bouncing to begin, give the trampoline a good once over. Gently shake it and bounce on it to ensure it is wobble-free.
- Set Safety Rules: Once your trampoline is set up and ready for use, you need to set some ground rules. Here are some suggestions…
- Only one person should use the trampoline at any time
- Sensible shoes should be worn
- The trampoline should never be used when wet
- Users should not attempt flips or tricks without proper training
- An adult should always be there to supervise
How Much Clearance and What Type of Surface Is Needed for Safely Placing an 8FT Trampoline?
Clearance and surface are essential when it comes to the safe set-up of an 8ft trampoline. Let’s look at these considerations:
- Perimeter Clearance: Safety guidelines recommend 2 metres of clearance around the edge of your trampoline. This clearance prevents users from colliding with nearby objects. It also allows for safe entry and exit from the trampoline.
- Height Clearance: There should be a minimum height clearance of 20 feet above the trampoline to prevent potential collisions with overhead obstructions. If your trampoline is below any tree branches or power lines, pay extra attention.
- Surface Type: Your trampoline should be set up on a level and stable surface. A flat, grassy area is a perfect choice, as it offers a natural cushioning effect and a brilliant bounce. Avoid setting up the trampoline on concrete or any hard surface, as it can increase the risk of injuries upon impact.
- Drainage Considerations: Another factor to bear in mind is drainage. Your chosen installation area should have proper drainage to prevent the ground underneath your trampoline from becoming waterlogged. Waterlogged ground can lead to instability.
- Wind Protection with an Anchor Kit: In areas prone to strong winds, you might want to invest in an anchor kit. Anchoring the trampoline prevents it from going for a walk in windy weather.
What Tools and Assistance Will I Need During the Installation of an 8FT Trampoline?
Setting up an 8ft trampoline is a manageable task, even if you’re not DIY savvy. However, it is important to ensure you have the right tools, and maybe a spare pair of hands, before you get stuck in.
- Get Your Tools in Order: As you get ready to set up your trampoline, make sure you have all your tools ready. You will need basic hand tools, for example, wrenches and screwdrivers. Depending on the manufacturer, you might also require other specific tools.
- Call in a Friend: It’s not impossible to set up an 8ft trampoline alone, but an extra pair of hands will make things easier.
- Safety Gear: To protect yourself whilst setting up the trampoline, make sure you wear safety gear such as gloves and goggles.
Conclusion
An 8ft trampoline can offer hours of fun and entertainment for your family, but safety should always be your top priority when it comes to setting up.
Follow the manufacturer's instructions meticulously, ensure you have proper clearance, choose the right surface, have your tools handy and call in a friend to help you. Then, once you’ve set up your trampoline, get some ground rules in place so bouncers know how to stay safe. With proper set-up and regular maintenance, your 8ft trampoline will offer hours of fun for years to come.